Enjoy a 30-day money back guarantee. If you’re not satisfied, contact us within 30 days of delivery.
View Policy
🍓🍪 Christmas Jam Cookie Press – Make Adorable Holiday Cookies at Home!
Regular price
$19.99
Regular price
$19.99
Sale price
$39.99
Unit price/ per
SAVE 50%
Sold out
CHRISTMAS BAKING · FESTIVE COOKIE STAMPS
Turn Plain Cookie Dough Into
Christmas Favorites.
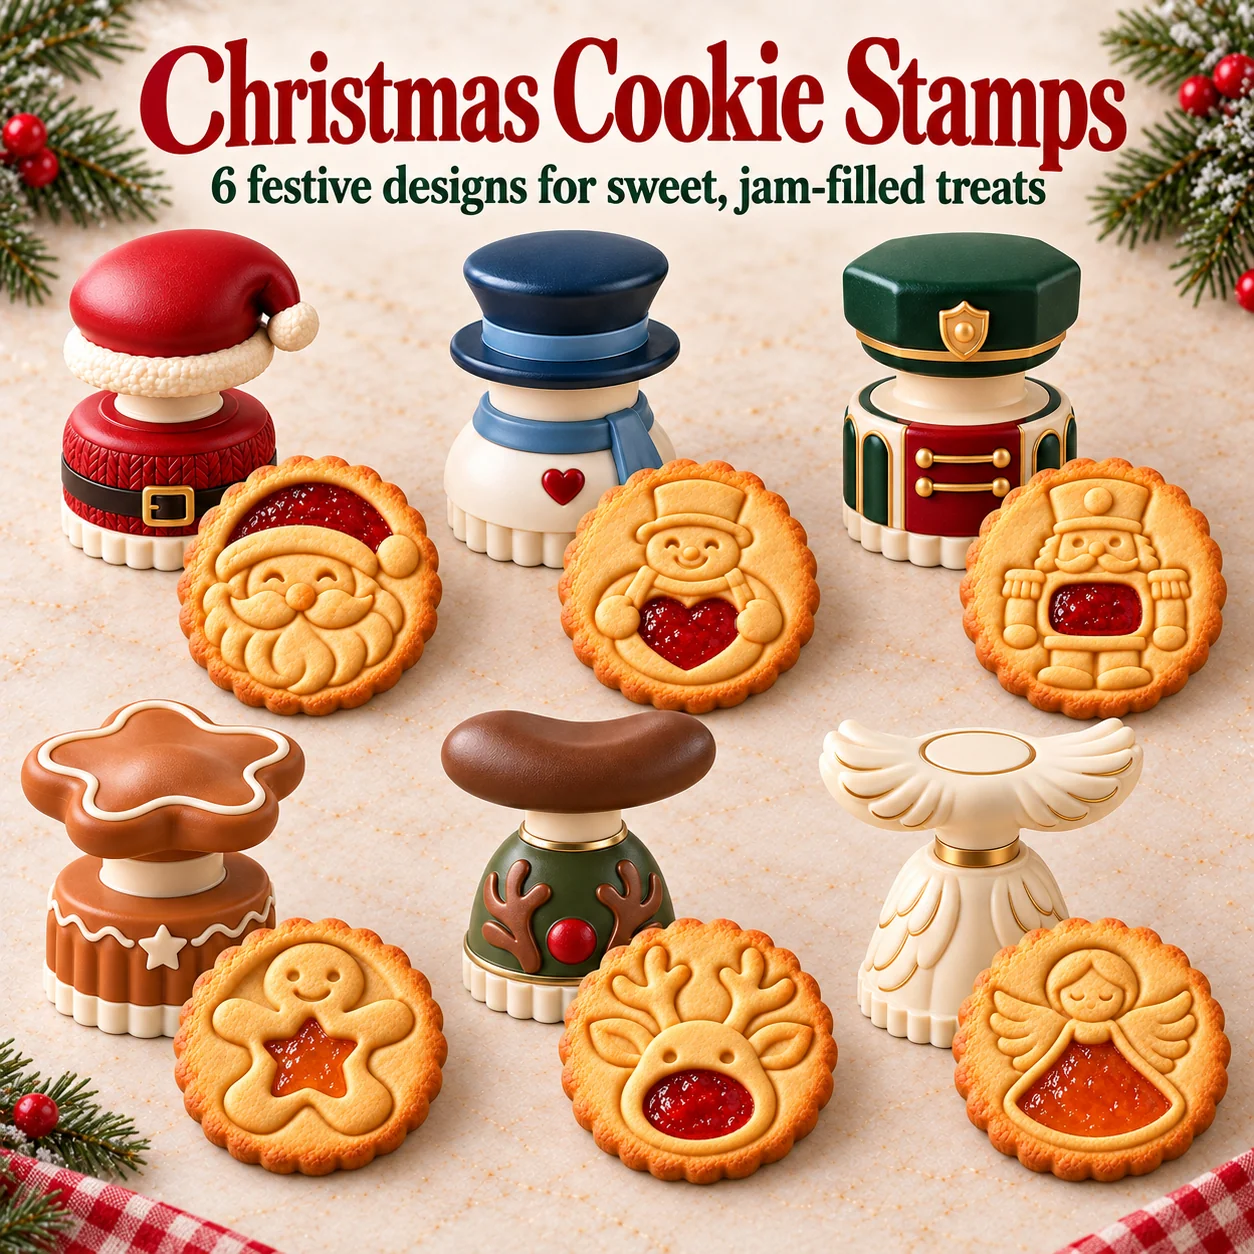
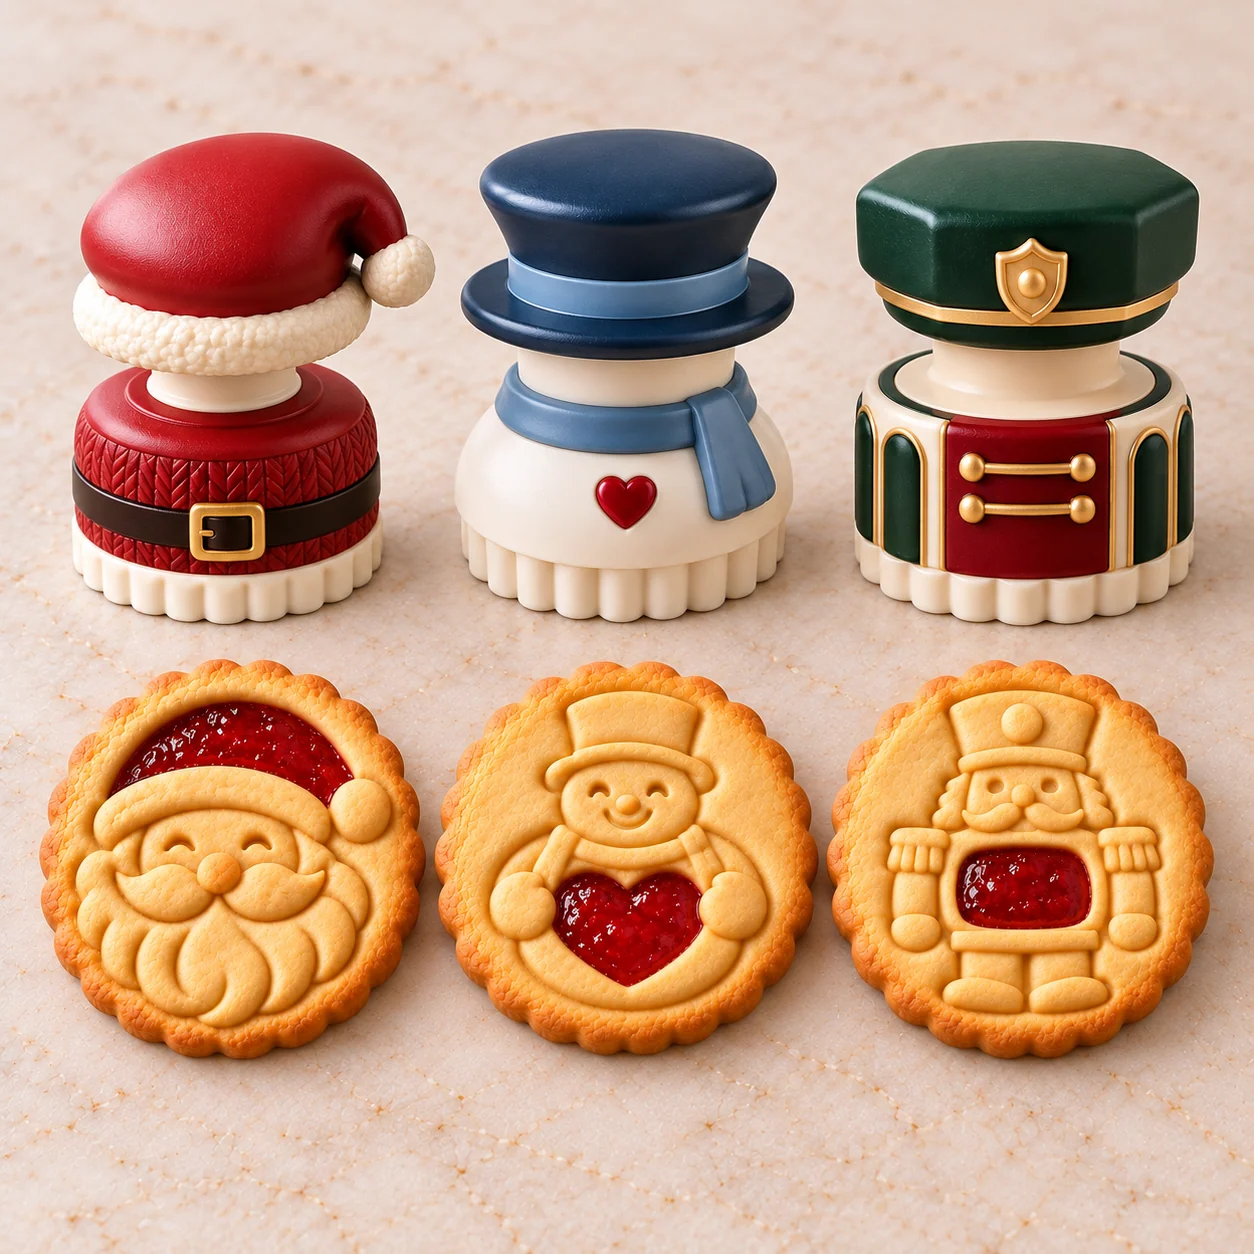
Make detailed Santa, snowman, reindeer,
and other holiday-shaped cookies without
hand-carving every design. Press the pattern
into rolled dough, bake the cookies, then
fill the recessed center with jam after they cool.
✓ Let everyone choose a favorite character
before stamping the dough.
02 / EMBOSSED PATTERN + JAM RECESS
Decorative Details Without Drawing Them by Hand.
Embossed character lines:
The stamp presses facial and clothing
details into the dough.
Recessed center:
Gives you a defined spot for a jam
topping once the baked cookie has cooled.
Recipe matters:
Dough that holds stamped detail will show
the design more clearly than dough
that spreads heavily.
✓ Add a colorful center after baking
without needing to hand-shape every cookie.
03 / EASY-GRIP HANDLES & REUSABILITY
Press, Wash, and Keep Them for the Next Batch.
Easy-grip handle:
Hold the stamp while pressing
the design into rolled dough.
Reusable plastic mold:
Hand wash and dry the stamp after baking
prep so it is ready for another session.
No baking the mold:
Remove every plastic stamp from the dough
before putting the cookies into the oven.
✓ Keep the molds for more holiday baking—
without adding single-use decorating tools.
04 / HANDS-ON HOLIDAY BAKING
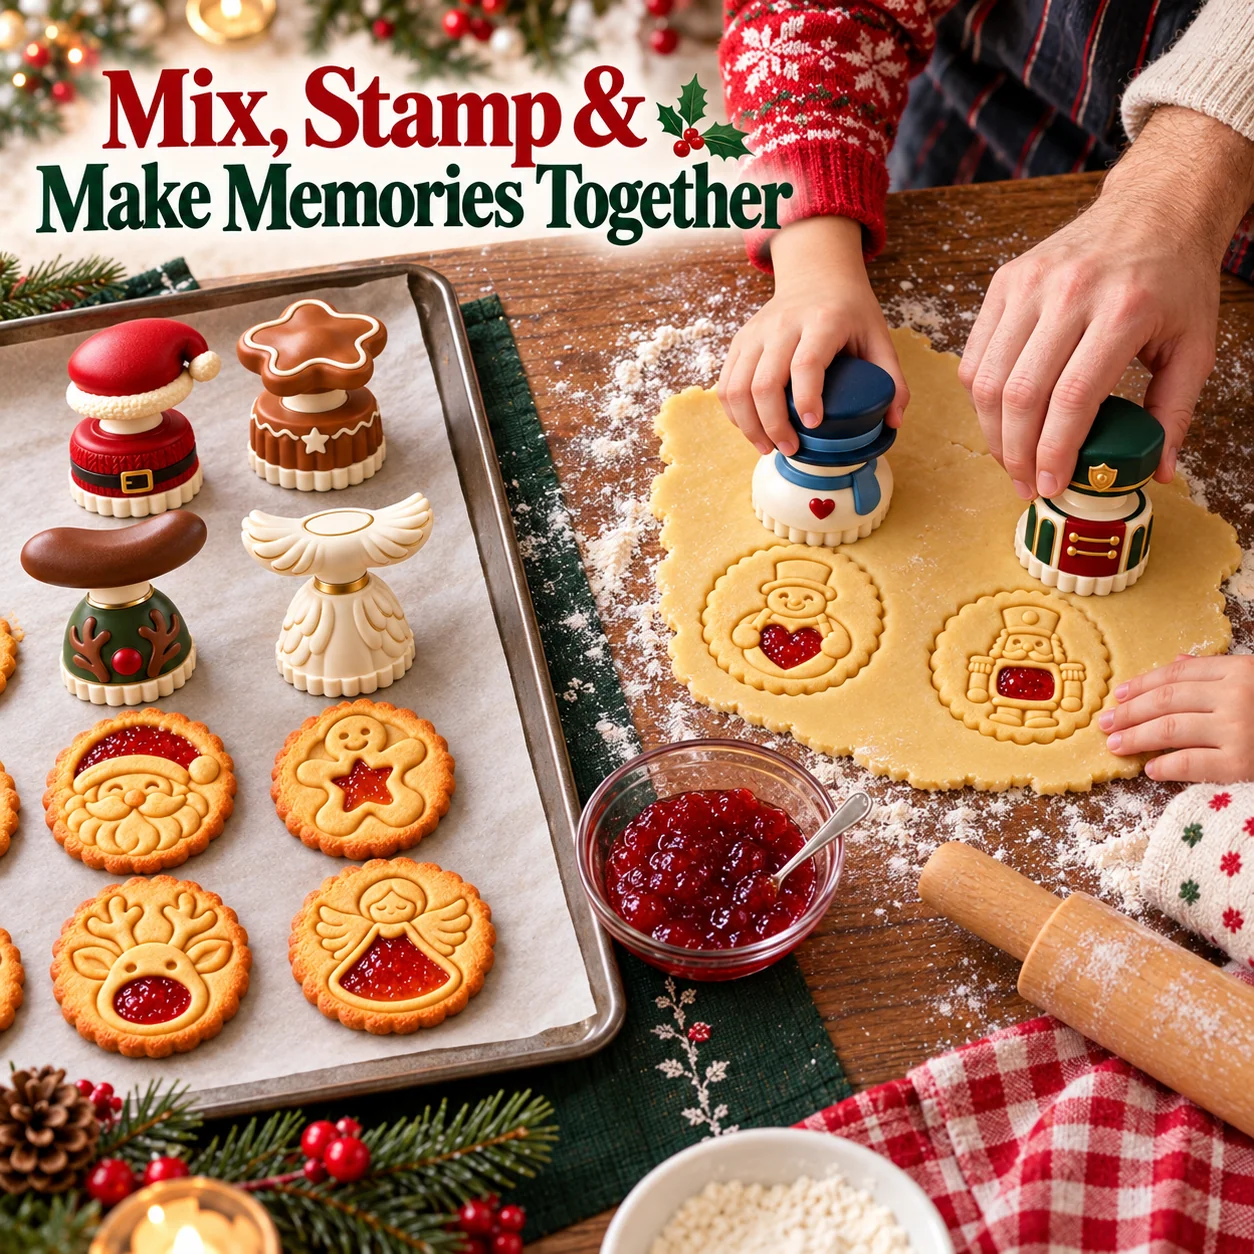
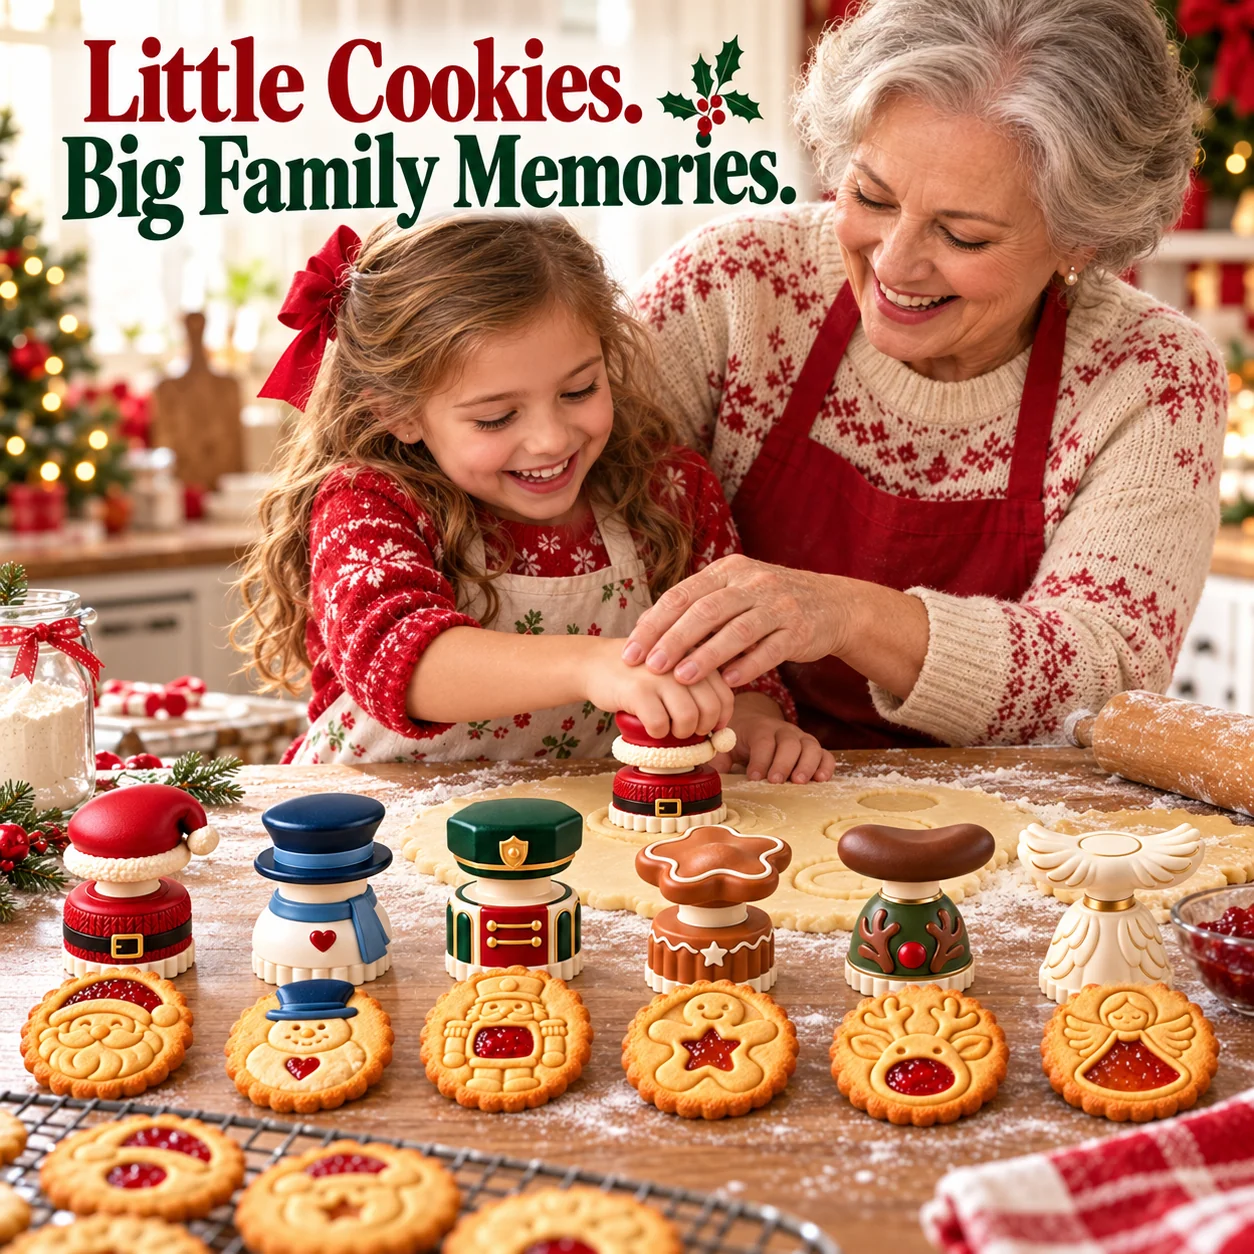
Give Everyone a Job at the Baking Table.
Easy to join in:
One person rolls the dough while another
chooses and presses a design.
Make different favorites:
Take turns picking Santa, a snowman,
or another character.
Finish together:
Adults handle the oven; once the cookies cool,
add your favorite suitable jam.
✓ A practical holiday baking activity
that ends with cookies you can share.
HOW TO USE · FOUR SIMPLE STEPS
Roll. Stamp. Bake. Fill.
01
Roll the Dough
Prepare and roll cookie dough to the
thickness recommended by your recipe.
02
Stamp the Design
Press the mold into the dough,
then lift it away carefully
to preserve the pattern.
03
Bake & Cool
Remove the plastic mold. Bake the dough
according to your recipe and let
the cookies cool completely.
04
Add the Jam
Spoon a little suitable jam into
the recessed center, then serve
or package your cookies.
Important:
The molds are plastic stamping tools.
Never place them in the oven.
Children should be supervised,
and oven steps must be handled by an adult.
CHOOSE YOUR CHRISTMAS CHARACTER
Pick the Cookie Design You Want to Make.
Six festive designs are shown. Tap a card
to return to the product options at the top
of the Shopify page, then select the actual
available style or set.
Fill the Cookie Tray With Something More Personal.
Serve the stamped cookies at a Christmas
get-together, bring a homemade batch to
a family gathering, or pack cooled,
finished cookies into your preferred gift packaging.
Embossed Character Patterns
and Recessed Jam-Fill Centers
Handle
Easy-Grip Stamp Handle
Reuse
Reusable with Proper Cleaning and Storage
Cleaning
Hand Wash with Mild Soap and Water;
Dry Completely
Heat Use
Do Not Put Plastic Molds in the Oven
FREQUENTLY ASKED QUESTIONS
Questions Before Your First Batch?
How do I use these cookie stamps?
Roll your cookie dough, press the stamp into it,
then remove the mold. Bake according to your
recipe, allow the cookies to cool, and add jam
to the recessed center.
Do I bake the molds with the cookies?
No. These are molded-plastic stamping tools,
not oven-safe baking molds. Always remove
them before placing the dough in the oven.
Should I add the jam before or after baking?
The supplied instructions show a roll, stamp,
bake, then fill process. Let the cookies cool
before adding suitable jam to the center.
What designs are shown?
The six illustrated designs are Santa Claus,
Snowman, Nutcracker, Gingerbread Man,
Reindeer, and Christmas Angel.
Does one purchase include all six designs?
The supplied product content shows six options
but does not confirm the quantity included
per order. Check the live product options
and package description before purchasing.
Will the stamped details stay visible after baking?
The molds create embossed impressions in unbaked
dough. Final detail depends on dough consistency,
stamp pressure, and how much your recipe spreads
in the oven.
How should I clean the plastic stamps?
Hand wash with mild soap and water, rinse,
and dry completely before storing.
Dishwasher compatibility has not been confirmed.
Can children use the stamps?
They can be part of a supervised family
baking activity. An adult should manage
the oven, hot trays, and any other heat-related steps.
SHOP WITH CONFIDENCE
Order Support for Your Holiday Baking Plans.
📦Trackable Logistics
Follow shipment progress when tracking
details are available.
🚚Trackable Delivery
Check eligible carrier updates
as your order travels.
🛡️Safe Packaging
Packaging intended to protect
the cookie stamps during transit.
💬Comprehensive After-Sales Service
Contact customer support with questions
about the order or product.
CHOOSE A DESIGN · ROLL THE DOUGH · MAKE CHRISTMAS COOKIES
Make Your Next Cookie Tray a Little More Festive.
Choose your available Christmas stamp style or set,
prep a favorite cookie recipe, and finish the baked
cookies with a colorful jam center.
Check the selected style and quantity at the top
of the product page before checkout.
HOLIDAY BAKING STORIES
Little Cookie Details That Make a Big Impression.
A place to share real customer feedback about
festive baking, cookie designs, and family time.
Melissa R.
United States · date: Oct 12, 2026
★★★★★
“I love baking Christmas cookies with my kids,
but decorating dozens of them by hand can take
a lot of time. The idea of pressing a Santa or
snowman design right into the dough is so appealing.
I especially like having a little recessed spot
for jam after the cookies cool, because it adds
color without covering the character details.”
Karen T.
United States · date: Oct 19, 2026
★★★★★
“The six designs would be a fun addition
to our annual cookie-making afternoon.
My favorite is the gingerbread character
with the star center, but I know everyone
in the family would want to try something
different. I appreciate the simple roll,
stamp, bake, and fill approach, especially
the reminder to remove the plastic stamp
before baking.”
Angela M.
Canada · date: Oct 25, 2026
★★★★★
“I like making homemade treats to share
with neighbors during the holidays.
A tray with different stamped Christmas
characters and small jam centers would
look much more festive than plain cookies.
I also like that the molds are reusable,
so they could become part of the decorating
supplies we bring out each December.”
IMPORTANT BAKING & CARE NOTES
Stamp the Dough—Not the Oven.
Remove the plastic stamps from the dough
before baking. Never place the molds in the oven.
Follow your chosen cookie recipe for baking
temperature, thickness, and timing.
Allow baked cookies to cool before
adding suitable jam to the recessed centers.
Hand wash with mild soap and water,
then dry completely before storing.
Finished shapes and embossing may vary
with dough texture and baking method.